WEB DESIGN . GRAPHIC DESIGN . PRINT . PROMOTIONAL

iPhone/iPad Tutorial
Note: As a courtesy to our customers, we provide online tutorials on how to configure various email software. Our staff however are not able to provide support on how to use your iPhone or iPad. For further assistance in using Mail on your iPhone or iPad, see Apple's Mail support pages.
Your email setting can be found by logging into your webmail here and then clicking on [Mail Client Configuration].
Set up an email account on the iPhone/iPad video tutorial
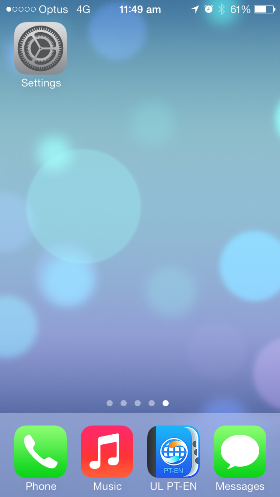
- 1. From the home screen of your iPhone/iPad, press the Settings Icon
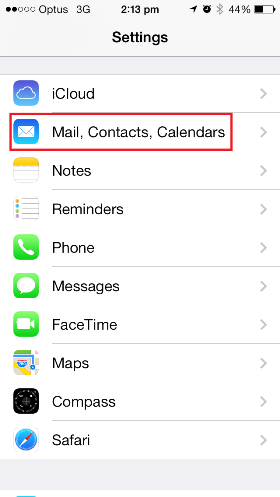
- 2. Select Mail, Contacts, Calendars
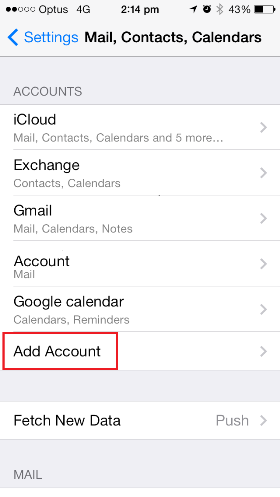
- 3. Under the Accounts section select Add Account
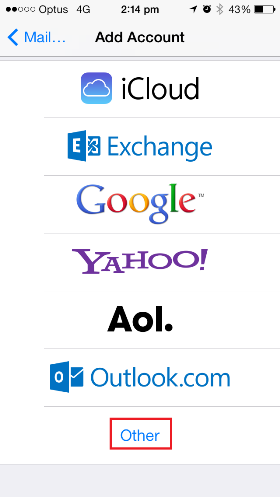
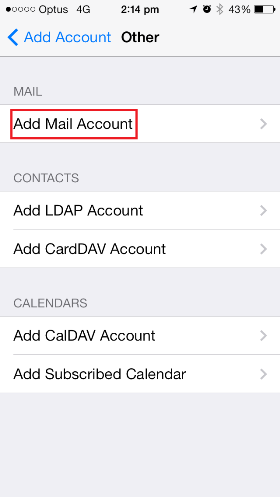
- 4. On the Add Account page select Other
- 5. Under the Mail section, select Add Mail Account
- 6. On the New Account screen, complete the following details:
Your Name: The name to be displayed when sending email
Address: Your email address, e.g. This email address is being protected from spambots. You need JavaScript enabled to view it.
Password: The password used for this email account.
Description: Any text description
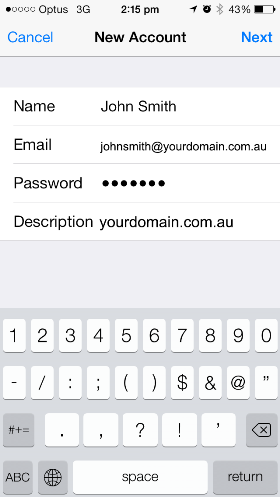
- 7. Press [Save]
The device may attempt to automatically retrieve the server settings. If it fails, continue following the steps below to configure your iPhone/iPad manually.
- 8. Our servers support both POP and IMAP. Select IMAP or POP from the mail account types depending on your preference
To learn more about the difference between the two, read our POP vs IMAP support page
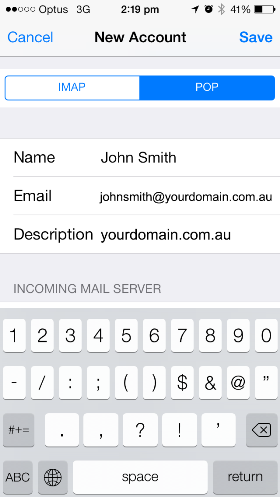
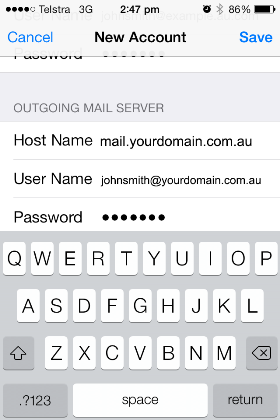
- 9. Scroll down the screen and complete the corresponding information.
Incoming Mail Server
Host Name: mial.yourdomain.com.au (Host Name is the same regardless of connecting via POP or IMAP). Where yourdomain.com.au is your domain name.
Username: Your full email address, eg. This email address is being protected from spambots. You need JavaScript enabled to view it.
Password: The password to your email address
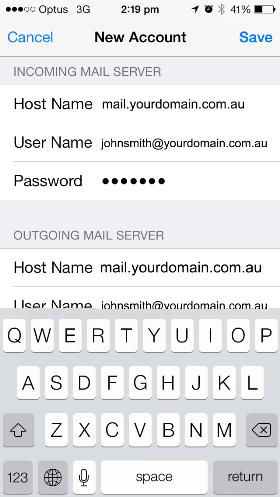
Host Name: mail.yourdomain.com.au
Username: Your full email address, eg. This email address is being protected from spambots. You need JavaScript enabled to view it.
Password: The password to your email address.
- 10. Scroll back to the top of the screen and press [Save].
Your device will now attempt to verify all the settings you’ve entered. You’ll need to wait for it to do this.
Note: You may be given a warning that your device cannot connect via SSL or that it cannot be verified
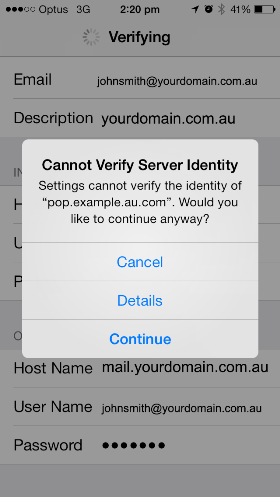
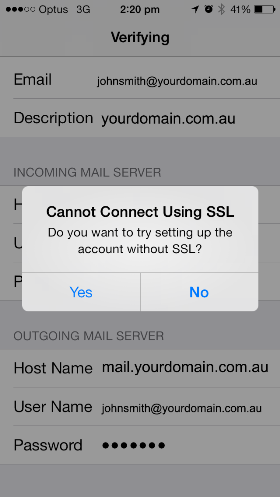
If this warning comes up, you may simply press continue.
- 11. That completes the configuration of your iPhone/iPad to our email servers. Before using it however, we recommend testing that a few other settings have been configured correctly. The iPhone/iPad is known for automatically using some default settings which may cause you some problems. Continue with the steps below to ensure that the settings on your device are manually set correctly.
Modify the Email Settings on your iPhone/iPad
- 1. From the home screen of your iPhone/iPad, press the Settings Icon.
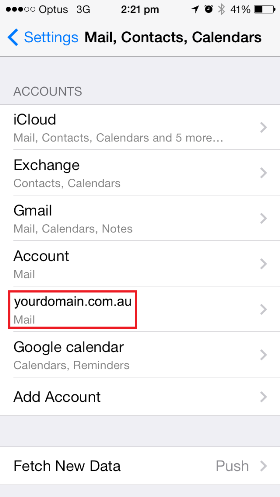
- 2. Select Mail, Contacts, Calendars.
- 3. The email account you just created will be displayed in the Accounts section.
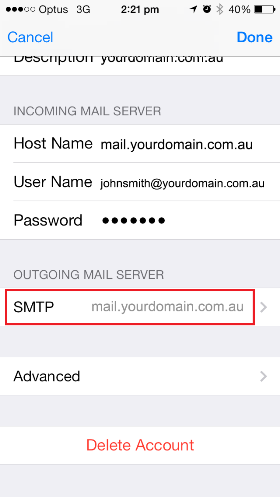
- 4. Select the email account you just created
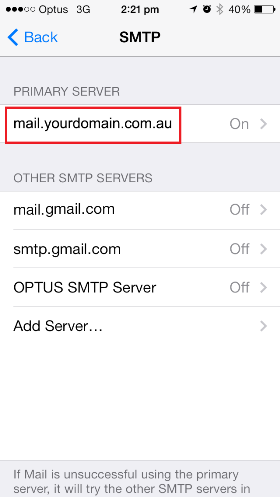
- 5. Scroll down to the Outgoing Mail Server section and press SMTP
- 6. If only using your email services with us on your device, your primary server should be mail.yourdomain.com.au. Select this SMTP server to configure it further
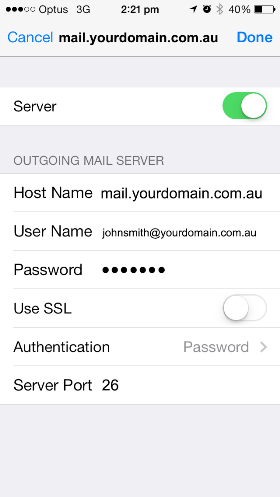
- 7. Modify the following information if not already completed:
SSL: Off.
Authentication: Password.
Server Port: 26.
If wanting to use SSL, set SSL to be on and the server port to be 465.
- 8. Press Done
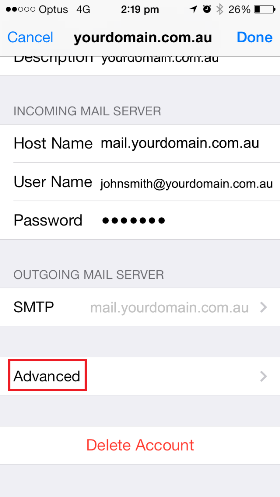
- 9. To modify your incoming mail server settings, go back to the mail email account page and press Advanced rather than SMTP
- 10. Modify the following information if not already completed:
SSL: Off.
Authentication: Password.
Server Port: 110.

- 11. From this screen, you may also allow your device to delete emails off of our servers when it downloads them or set them to delete after a set period of time.
You’re now complete. Test by sending an email to the account.