WEB DESIGN . GRAPHIC DESIGN . PRINT . PROMOTIONAL

Outlook 2003 Tutorial
Note: As a courtesy to our customers, we provide online tutorials on how to configure various email software. Our staff, however, are not able to provide support on how to use Microsoft Outlook. For further assistance in using Microsoft Outlook 2003 please see Microsoft's Outlook 2003 support pages.
Your email setting can be found by logging into your webmail here and then clicking on [Mail Client Configuration].
Set up an email account in Outlook 2003 video tutorial
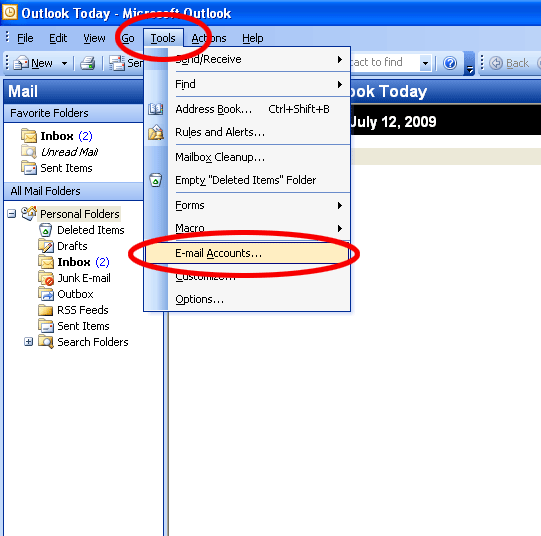
- 1. Open Microsoft Outlook 2003
- 2. Click Tools
- 3. Select E-mail Accounts
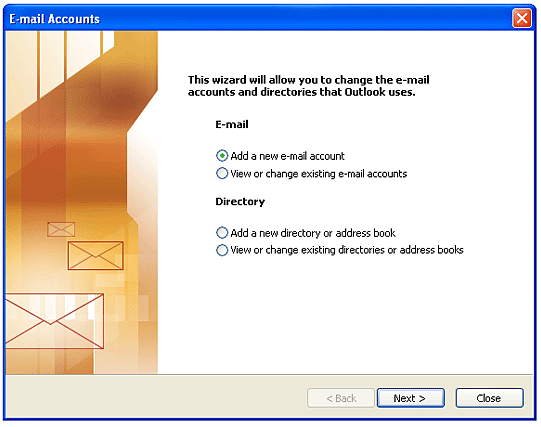
- 4. Select the Add a new e-mail account option
- 5. Click [Next]
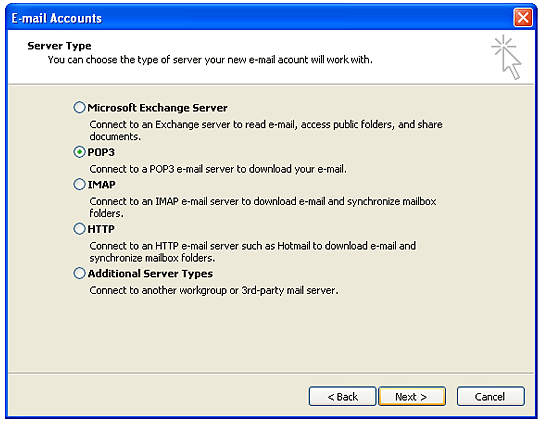
- 6. Select the POP3 option
- 7. Click [Next]
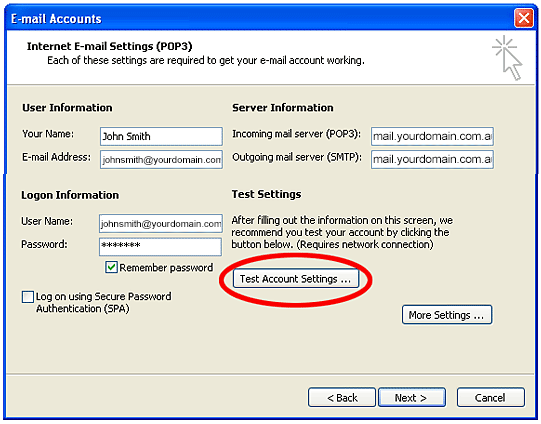
- 8. Complete the following information:
Your Name: The name you wish displayed when people receive your emails
Email Address: The email address you are sending email from
Incoming mail server: mail.yourdomain.com.au regardless which account type you’ve selected - POP or IMAP)
Outgoing mail server: mail.yourdomain.com.au or your Internet Service Provider’s (ISP) outgoing mail server
User Name: The full email address is required, e.g. This email address is being protected from spambots. You need JavaScript enabled to view it.
Password: The password used for this email account
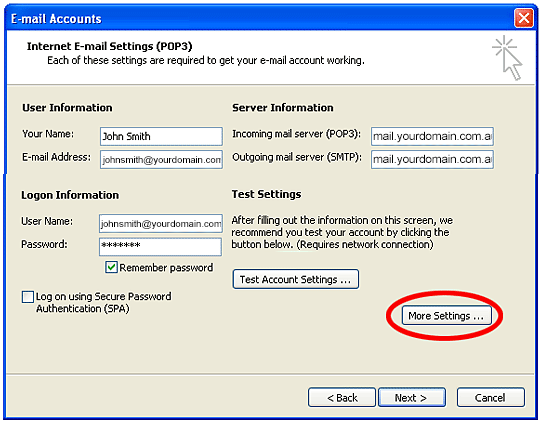
- 9. Click [More Settings]
- 10. Select the Outgoing Server tab
- 11. Select the My outgoing mail sever (SMTP) requires authentication checkbox and Use same settings as incoming mail server

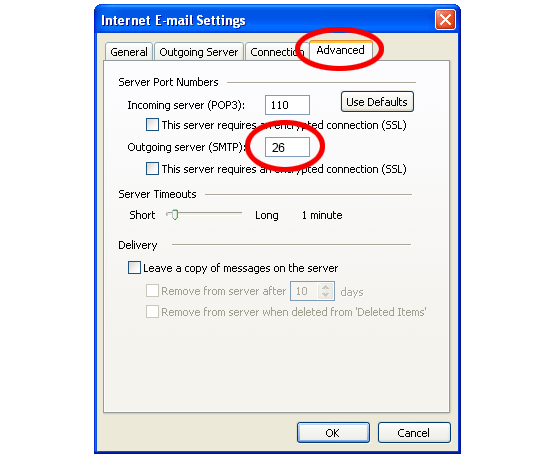
- 12. Select the Advanced tab
Users can choose whether to use SSL or not, both are supported on our servers
With SSL Encryption
This server requires an encrypted connection (SSL) = Selected
Change the Outgoing server (SMTP) number to 465
Without SSL Encryption (Default)
This server requires an encrypted connection (SSL) = Unselected
Change the Outgoing server (SMTP) number to 26
Use the following type of encrypted connection = None
Note: Enabling SSL on shared email services can cause some warnings in your email software - 13. Click [OK]
- 14. Click [Test Account Settings]
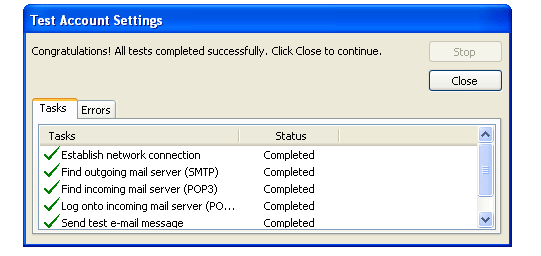
- 15. If all is correct, the following popup window should display a successful completion message
- 16. Click [Close]
- 17. Click [Next] button, then [Finish] button
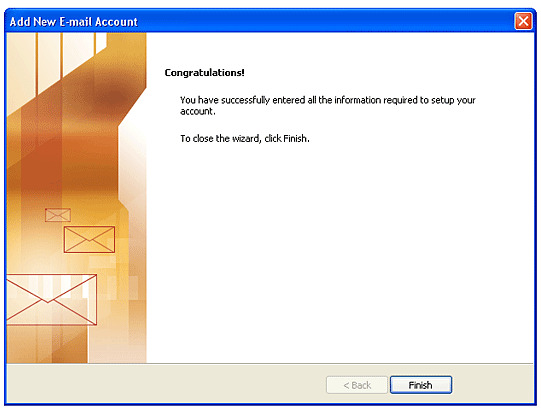
This completes the setup of your email account in Outlook 2003.